How to use AnnotQTL
Summary
- Chromosomal location
- SNP dataset
- Highlight with GO terms
- Highlight with Mammalian Phenotype
- Highlight with OMIM disorders
- Synteny conservation options
- AnnotQTL as a webservice
As mentioned, the AnnotQTL tool was designed to provide the most complete annotation of a specific chromosomal region to help in the selection of the best candidate genes.
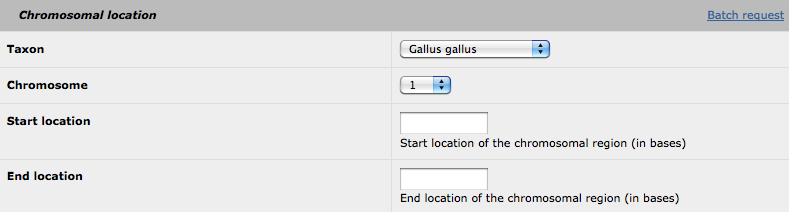
1. Chromosomal location
This is the only part for which all the fields must be filled. For a single request, you can select your species, the chromosome of interest and thegenomic location (in bases).
By clicking on the 'batch request' link, the following form is available:
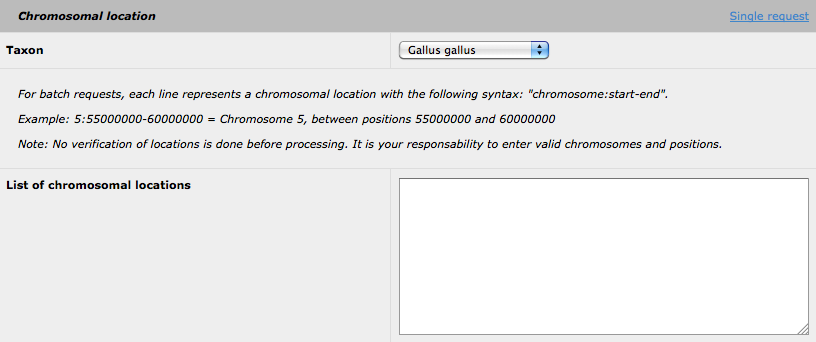
Then, you can submit many request for several different genomic regions, using the following format: taxid:chr:start-end. Please note that you can still use the highlight options (using either GO, MP or OMIM) for all the selected region (nevertheless, the highlighted biological function will be the same for all the regions). The insertion of SNP data is also available using the batchrequest form. Please be advise, that the analysis of a batch request could be request form. Please be advise, that the analysis of a batch request could be keywords for the GO or MP highlight option.
2. SNP dataset
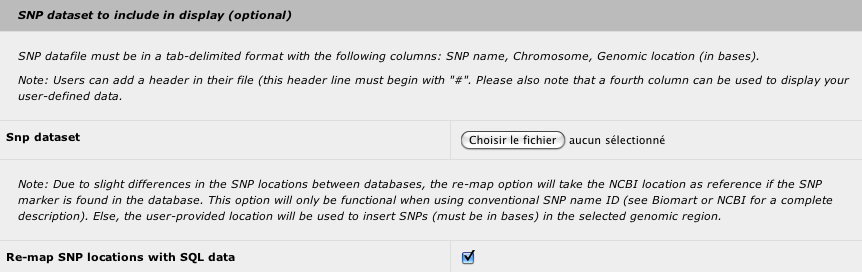
You can insert your marker dataset in the result to identify the closest genes from the most significant markers. You can also use any types of makers as long as a genomic location in base is provided. The tab-delimited file must have the following structure:
- marker name or snp ID (i.e. rsXXXXXXX)
- chromosome name (i.e. 1)
- genomic location in bases
- optional column to display user-defined data (this column can be left empty)
With a SNP dataset with official SNP id, you can choose to use your genomic location or the genomic location provided by the NCBI (default).
3. Highlight with GO terms
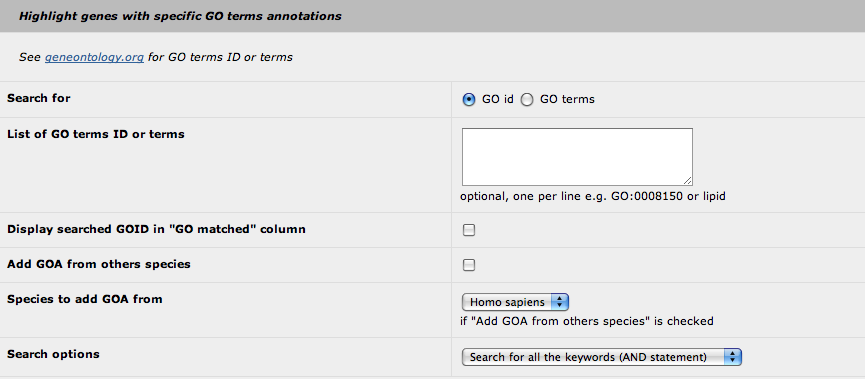
It seems most relevant to highlight some genes annotated with a specific GO term rather than to display all the GOA for the genes. Obviously, this feature was developed to highlight genes for which the functional annotation is relevant to the studied phenotype. Therefore, you can highlight genes in two ways: by using directly one or several GO id (i.e. GO:0008150) or a GO term (i.e. lipid). The first way is more stringent as the software will only pick up the defined GO id. With the GO term request, the search is performed in a "text mode", so every GO id with the keyword will be selected. The text mode search is quite simple: you cannot use generic character (*, $ or %). Be aware that that you can perform a request with fragments of a keyword (i.e. lipi or lipid will give the same results).
For both search modes, the program will reconstruct the relationships of the selected GO terms and their children terms. Hence, the highlight feature will not only highlight the genes annotated with the specified GO terms but also the genes annotated with the children terms.
At this point, we can choose to display which GO id has permitted to highlight the genes (as it can be a children term). You can add the GOA from others species (based on the orthologous genes): Homo sapiens, Mus musculus or both.
Finally, you can defined the request mode if you provide two or more keywords: the AND statement, that selects the GO terms with all the keywords, or the OR statement, that selects the GO terms with at least one of the keywords.
4. Highlight with Mammalian Phenotype
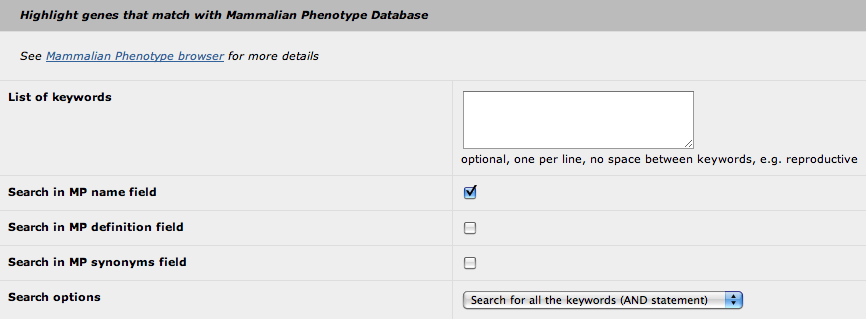
The principle of this "highlight" feature is similar to the "highlight with GO" feature (see above). The only differences are:
- you cannot use the MP id (only keywords)
- you can select in which field the search will be performed
5. Highlight with OMIM disorders
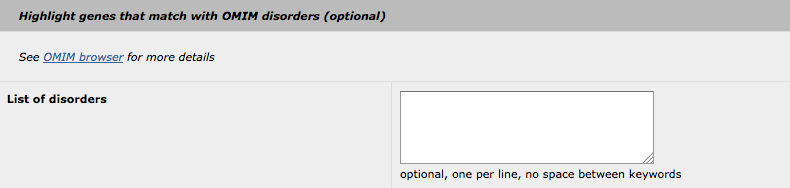
The principle of this "highlight" feature is similar to the others (GO and MP). The user-supplied keywords are used to search through OMIM disorders. Please note, that all keywords will be searched with the "OR" statement (no option is available to change this statement to "AND", as the OMIM disorders database is not large enough for such queries).
6. Synteny conservation options
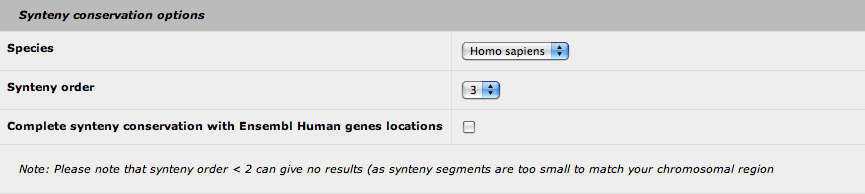
AnnotQTL brings you the synteny conservation data from the Narcisse program to your genomic location. Currently, only the Human genome is used for comparison. You can define the synteny order value (default: 3) that set the size of the conserved genomic fragment (see the Narcisse documentation for more details). Be aware that values less than 2 can give no results, as the genomic fragment can be too small. Finally, you can add the synteny conservation data from Ensembl (based on the locations of the Human orthologous genes) to complete the Narcisse results.
At this point, you can click on the "submit" button to retrieve your results. In the result page, you can choose to display or hide some columns. At the bottom of the page, you find two links to export the full data in XML or TSV (tab-delimited file) format.
7. AnnotQTL as a webservice
SOAP webservice
AnnotQTL is available as a webservice using the standard SOAP protocol. The WSDL file is available at this address.
A minimalistic web interface is available to test the service invocation.
GenOuest platform is providing several other webservices, which are available here. Another source of usefull webservices is BioCatalogue.
Invoking AnnotQTL from java code
Using the webservices, you can execute AnnotQTL requests directly from your java code. WSDL2Java is the perfect tool to achieve that.
Reading the Axis2 documentation is a good idea to start using WSDL2Java, but here are the main steps (tested on linux platform but it should work on other platforms):
First download Axis2 from the project website. Uncompress the archive somewhere on your hard disk drive and define AXIS2_HOME environment variable (as the method depends on your OS platform, see the Axis2 documentation for more details).
Once Axis2 is installed, you can use the WSDL2Java script that is included in Axis2 archive:
$AXIS2_HOME/bin/wsdl2java.sh -d adb -s -uri http://webservices.genouest.org/typedservices/annotqtl.wsdl -p a.custom.pack.name -o /tmp/outputFolder
This command will generate some java classes that will be needed to invoke the webservice in your program.
The next step is to create a jar file for these classes:
ant jar.client
Once finished, you are ready to use this new library in your java code. Here is a simple example of an application that performs an AnnotQTL request. Do not forget to add your new jar file and axis2 libraries in your classpath.
package test.pack;

import org.apache.axis2.AxisFault;
import a.custom.pack.name.AnnotqtlStub;
import a.custom.pack.name.AnnotqtlStub.JobSubOutputType;

public class TestClient {
	public static void main(String[] args) {

		AnnotqtlStub stub =null;
		try {
			stub = new AnnotqtlStub();
		} catch (AxisFault e) { e.printStackTrace(); }

		AnnotqtlStub.JobInputType inType = new AnnotqtlStub.JobInputType();
		inType.setTaxon("9031");
		inType.setChr("1");
		inType.setStart("1");
		inType.setEnd("10000000");

		AnnotqtlStub.LaunchJobInput input = new AnnotqtlStub.LaunchJobInput();
		input.setLaunchJobInput(inType);
		try {
			AnnotqtlStub.LaunchJobOutput output = stub.launchJob(input);
			JobSubOutputType outType = output.getLaunchJobOutput();
			System.out.println("Job "+outType.getJobID()+" submitted with status "+outType.getStatus().getCode()+" ("+outType.getStatus().getMessage()+")");
		} catch (Exception e) { e.printStackTrace(); }
	}
}
In this example, we use the operation 'launchJob' to request the chromosome 1 of the Gallus gallus species (NCBI taxon Id: 9031) between positions 1 and 10,000,000. Another operation ('getOuputs') is available to retrieve the results.
All the options available on this website are available using the webservice. See the WSDL file for documentation of each option.